
Sola School Bouquet Tutorial
Learn how to create a bouquet using Sola Wood Flowers with the help of our step-by-step tutorial. In this tutorial, we’ll cover everything from preparation to finishing touches! Let’s get started with the materials.
|
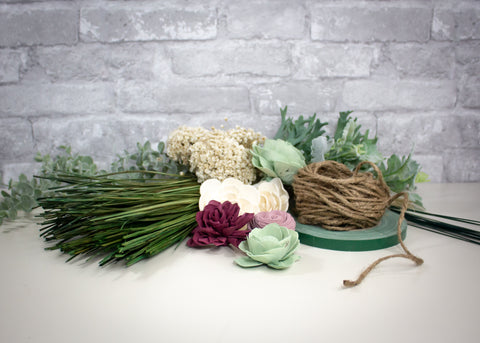
Materials:
|
Tools:
|
[[supplies]]
Step One: Set-Up for Success
Prepare all of your crafting materials from your Bouquet Kit, or from the list above. Make sure you have all the components you need in all the correct colors (if you’re using colored flowers). Next, set them out in places that are easy to reach and make sure you have plenty of space. Double-check that your glue gun is plugged in and do a quick count of all of your flowers and stems to make sure you have enough of each for the size you’re going for! If you have a glue-pot, get some glue started melting now.
Step Two: Prepare Tape and Filler

Start by preparing the different parts that will be used to make your Bouquet. We usually prepare to craft in this order:
- Cut your tape.
Make sure to cut all of your tape into smaller pieces about 12 inches long, this way you can apply each piece of tape to your bouquet as needed with ease once we get to that step.
- Prepare your filler.
Break your filler into smaller groups to spread it throughout your Bouquet. We break our filler down into small bunches with a few “heads” per filler bunch. There isn’t a “correct” size for your filler so feel free to break it into smaller or larger bunches depending on the design you have in mind!
Step Three: Flower Stemming

Start this step by making sure that you have your glue gun turned on, or your glue-pot warmed up to make this as easy as possible. Along with this, make sure you have your flowers, stems, and gluing tool in front of you, with each of them in reach.
- Holding the flower you want to stem in one hand, place a dab of glue the size of a pea on the back of the flower. If you’re using a glue-pot, hold the flower you want to stem in one hand and the stem in the other. Then dip the stem in the glue-pot to apply glue to it and continue to step two.
- Being careful not to burn yourself, gently twist/push the stem into the base of the Sola Wood Flower, this should be easy and should only go in around one-half of an inch (about the width of your pinky finger).
- Repeat steps 1 and 2 with each flower you want to use until you have a full set of stemmed flowers. Be careful as hot-glue can get quite hot and burn you!
Step Four: Assemble the Bouquet

Now we’re going to build the general shape of the bouquet.
- Start by holding a single stemmed-flower in one hand, and use your other hand to add flowers in a spiral-like pattern. Be sure to grab flowers that are different sizes, shapes, or colors to keep the arrangement from becoming too uniform, variety is the spice of life!
- Continue the spiral pattern making sure to make each row of flowers slightly lower than the previous, this will start to build out the round shape of your bouquet. Don’t pack your flowers in too tightly, we’ll fill the small spaces in between the flowers with filler later.
- Add the rest of your stemmed flowers to the arrangement following the same pattern.
- Once you’ve placed all of your flowers take a look at the shape and design you’ve made. Placing different sizes, styles, and colors of flowers next to each other is a good way to bring contrast to the piece! To add depth, raise and lower some of the flowers a bit so that they aren’t in such an obvious pattern, and have some life to them.
Now that we have a general shape we’ll add the filler!
- If you’ve shaped your bouquet properly you should have little spaces in-between flowers throughout the piece, these are what we’ll be using for our filler. Start by locating one of these gaps.
- Next, take one of the bunches of greenery/filler that you made and insert it into the gap until you have as much of the filler as you’d like sticking out above the flowers.
- Continue locating and filling gaps with filler until you’re satisfied with the amount that you have in your design.
- If you don’t like the way that your filler is dispersed don’t worry! Simply spread out a section of flowers and add another bunch of filler.
Success, you should have a proper bouquet staring back at you! If you don’t love it, adjust and rebuild until you are satisfied, but be sure to limit yourself. It’s easy to spend hours toying with an arrangement and end up frustrated with a piece that was actually beautiful in the beginning—We’ve done it WAY too many times!
Step Five: Secure your Bouquet

Now that you have a proper bouquet you’re done! Right? Well, maybe not... because you’re probably still holding the bouquet in one hand. To fix this we just need to add a bit of tape.
- Still holding the bouquet in one hand, grab one of the pieces of tape that you cut earlier and left in an easy to access place, and wrap it around the bouquets “handle” right where the stems start to come together tightly.
- Next, add a second and third piece of tape each a few inches below the one above it. As a note, if you want a longer handle you may want to place a fourth piece of tape to secure the entire handle tightly.
- You should now be able to loosen your grip on the bouquet and have it keep its shape. If you cannot, add more tape and make sure the handle stems are pulled together tightly.
Step Six: Trim the Handle and Wrap

At this point your bouquet looks great from the top, but the handle is probably a mess of stems and filler bits. We’ll fix that and leave only a beautiful bouquet behind.
- To find out how long your handle should be, we suggest taking it for a test run. If you want to hold this bouquet when you’re walking down the aisle or want to for an accent piece in your next photoshoot then hold the bouquet in your hands exactly as you picture yourself doing then, and make note of where the bottom part of your hand is. If you’ll be placing it in a vase, hold the vase up to the bouquet and make note of how tall your vase is to make sure you cut in the right place.
- Now that you know how long you want the handle to be, take a good pair of wire trimmers and cut the handle slightly longer than you need. Cutting it a little longer gives you a second chance to test the length, and reduces the odds that you will cut it too short.
- If the handle is still too long then keep trimming and testing until you’re right where you want to be.
Now we’re going to wrap the handle. This can be done with whatever you’d like to use, but we often include twine or lace as a wrap.
- Place a small dot of glue in the middle of the bouquet’s handle and place your wrapping material on it to glue it to the surface. Let the wrap sit for a moment to dry/cool down so that it doesn’t pull off when you start wrapping.
- Once that is firmly attached, wrap your bouquet until it looks good to you—beauty is in the eye of the beholder—and trim any leftover material you don’t want to use.
- Finish wrapping the handle by placing another dot of glue and attaching the rest of your wrapping material. Trim if you need to, relax your shoulders, unclench your jaw, and admire the arrangement you’ve just finished.
Final Notes

These instructions are meant to help you understand how to make a traditional bouquet with Sola Wood flowers and shouldn’t be treated as the ONLY way to make a bouquet with Sola Wood. The beauty of crafting is its ability to let us make something that is unique to each of us and gives us a way to express our creativity. One part of being creative, that we’re very familiar with here at Sola Wood Flowers, is trying something and messing up. In some cases, these directions will not contain everything you need to finish the arrangement you’ve imagined, in other cases it will take multiple tries and initial designs before you get it how you want it. The important thing is that we enjoy the journey, get the chance to experiment, and take something we’ve imagined and make it real.
- Sincerely, Sola Wood Flowers
[[supplies]]


