CLASSIC CASCADE BOUQUET TUTORIAL - SOLA WOOD FLOWERS
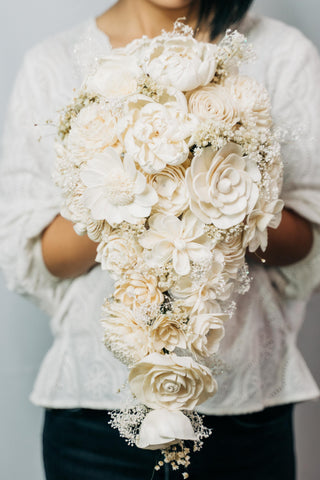
A cascading bridal bouquet is traditional and classy. The arrangement cascades down like a waterfall. This makes the flowers look as if they're flowing over the bride’s hands.
Here's a step-by-step tutorial to guide you in creating your own cascade bouquet. This DIY style is applicable to colored flowers too. View this How to Dye post if you want to paint or dye the flowers to match your wedding theme.

FLORAL SUPPLIES AND TOOLS NEEDED

- Sola Wood Flowers
- Dried Star Flowers
- Baby's Breath
- Cutting Shear
- Glue Gun
- Floral Tape
- Floral Wire
- Burlap Twine
[[supplies]]
STEP 1: PREPARE THE MATERIALS NEEDED
First, gather your supplies. All the floral supplies are available at Sola Wood Flowers.

Break the fillers in smaller bunches. This will make it easier to grab and insert when you start arranging the flowers.

Do the same way with the baby's breath fillers. They get tangled pretty easily so it's great to break them apart beforehand.

STEP 2: Stem the Sola Wood Flowers
Apply hot glue to the tip for the floral wire then carefully push into the base of the flower. You may also squeeze a dab of glue to the underside of the bloom then poke through using wire. Let the glue dry and make sure the flower is firmly attached to the stem.


Stem all the needed flowers before starting to make the arrangement. You may keep excess stemmed flowers for future use.
Learn how to stem Sola Wood Flowers like a pro in this Tutorial.

STEP 3: Start Arranging the Bouquet
Pick one bloom, preferably a closed bud or half open flower. This will serve as the tip of the cascade drop.

Add a larger flower below it. Start adding fillers as you arrange and complete the cascading part of the bouquet.

Wrap with floral tape as you go for added support and stability.

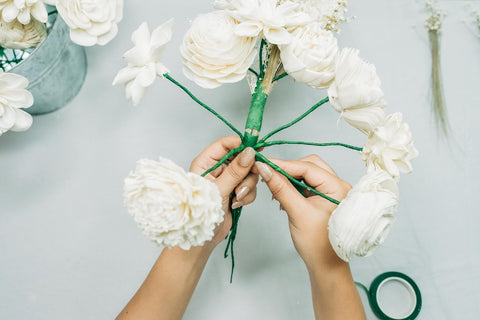
Continue to add flowers in a triangular pattern. Once you reach the desired length of the cascade, secure with tape. Bend the stem towards you. The bent stem will serve as the holder.

Build the top or head of the bouquet. Grab 5 to 6 stems and form a circular base then gradually add more flowers.


Continue adding more layers until you are happy with the size and look of your bridal bouquet.

STEP 4: Add More Accents
Insert dried star flowers and baby's breath to fill in the spaces in the arrangement.

Surround the underside with generous amount of dried star flowers. Secure it with floral tape.

STEP 5: Cut the excess stems
Trim any unruly ends with a cutter to make the bottom even. The handle should be comfortable to carry.

STEP 6: Wrap the Handle with Burlap Twine
Apply glue at the topmost part of the floral tape. Stick the burlap twine then twist and wrap until the handle is fully covered. Secure the ends with hot glue.


[[supplies]]
