
DIY SOLA WOOD FLOWER WRIST CORSAGE
Learn how to make a DIY wedding wrist corsage using sola wood flowers. Create with this easy video tutorial or by following our step-by-step how-to below.
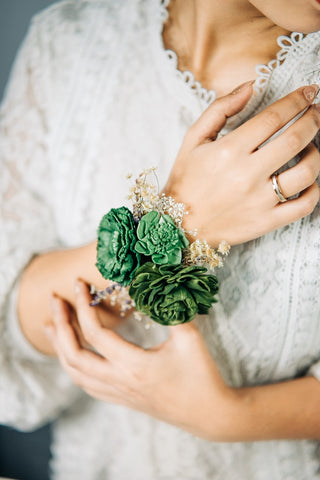
This Sola Wood Flowers and lace wrist corsage tutorial is easy to make. Craft unique and long-lasting floral pieces for any occasion, be it a wedding, prom or formal event. For weddings, it is something you can gift to your bridesmaids, a special token for them to keep and appreciate, forever!
Floral Supplies and Tools Needed

- Sola wood flowers
- Star flowers
- Lavenders
- Baby’s breath
- Lace
- Sola dye
- Sola Softener
- Glue gun
- Glue Pad
- Glue stick
[[supplies]]
STEP 1: Gather supplies and tools

Make sure all your supplies are within reach and the glue gun heated before starting.
STEP 2: Dye the sola wood flowers

Pour water into a bowl. Add the sola softener and stir thoroughly.

Pour the sola dye and mix well. Your dye bath is now ready.

Dip-dye the flowers. Let them dry for at least 24 hours.

Check this How To Dye Sola Wood Flowers tutorial. You will learn the basic steps of using sola dye to color the flowers.
STEP 3: Prepare the lace

Protect your table surface by using a glue pad.
Cut the lace length to tie around the wrist. Lay down the lace on top of the pad.
STEP 4: Glue sola wood flowers in the middle of the lace
For an ideal-sized corsage, use three flowers, but feel free to use as little or as much depending on how simple or elaborate you want the arrangement to be.


Apply glue at the back of the flower then attach it to the lace. Repeat the procedure for the rest of the flowers.


Allow spaces in between the flowers to make it easier for the fillers to go through.
STEP 5: Insert Greenery and Fillers
Snip the star flowers to the desired length.

Arrange by tucking stems through the flowers.

Clip baby’s breath and arrange in between the flowers.

Cut the lavender sprigs and tuck them through the last remaining spots.
This personalized wrist corsage is worth keeping. With sola wood flowers, you can keep sentimental displays for a lifetime.

[[supplies]]