
How to Make a Flower Girl Pomander Ball
A pomander or floral ball is a lovely option for a tiny hand-tied bouquet for the flower girl. Using sola wood flowers makes it light and hands-free for the flower girl who can have fun with a bit of a graceful swing during the entourage march.
These few steps are repetitive, but fun! You’ll be able to complete one ball in no time.

Floral Supplies and Tools Needed

You can always find alternative greenery and accents in our FILLERS section.
- Sola Wood Flowers
- Champagne Baby’s Breath
- Glue Gun
- Styrofoam Ball (5”)
- Glue Stick
- Lace
- Floral Wire
STEP 1: Prepare the Materials
Floral supplies are available at Sola Wood Flowers. For the Styrofoam ball, you can easily buy one at a craft store

STEP 2: Attach Lace to the Styrofoam Base

Create a wire loop using a plier.

Add the lace handle. Push the wire pin into both ends of the lace securing it to the Styrofoam ball.

The lace and pins will be reinforced later when the flowers are glued to the base.
STEP 3: Attach Sola Wood Flowers
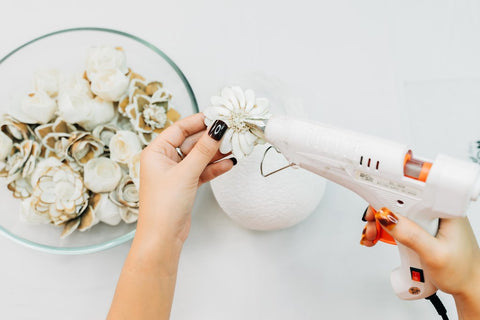
Squeeze a dab of glue at the back of the flower.

Gently press on the Styrofoam and hold for a moment making sure it is firmly glued.
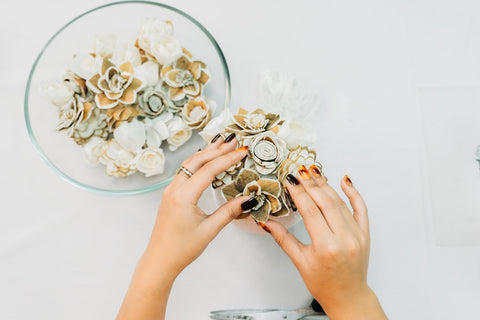
Add more flowers overlapping the petals as you go. Distribute the different types of flowers so that there’s variety in each portion of the ball.

Some flowers have longer receptacles than others. For this project, it is best to cut or shorten them so that they level with the rest of the blooms.

Cover the entire ball. Make sure the flowers are balanced.
STEP 4: Insert Fillers

Break the champagne baby’s breath fillers into smaller sprays. This will make the next step easier. You can use any fillers that you have available.

Add a bit of glue to the filler stem then insert it in between the blooms.

Add as many fillers as you would like.
STEP 5: Let Your Flower Girl Wear It
Your flower girl will love carrying this down the aisle on your wedding day.

Beyond the wedding, the floral ball can be displayed in your home for years to come.